A place for you to learn, get inspired, and keep up to date with all things SmugMug and photography


Photographers: Boredom happens! Even in the most creative endeavors, we can find ourselves in a bit of a rut. Fortunately, there are lots of ways to keep the boredom at bay. Here's ten ideas to help you stay fresh in your photography.
Let's dive into each one.
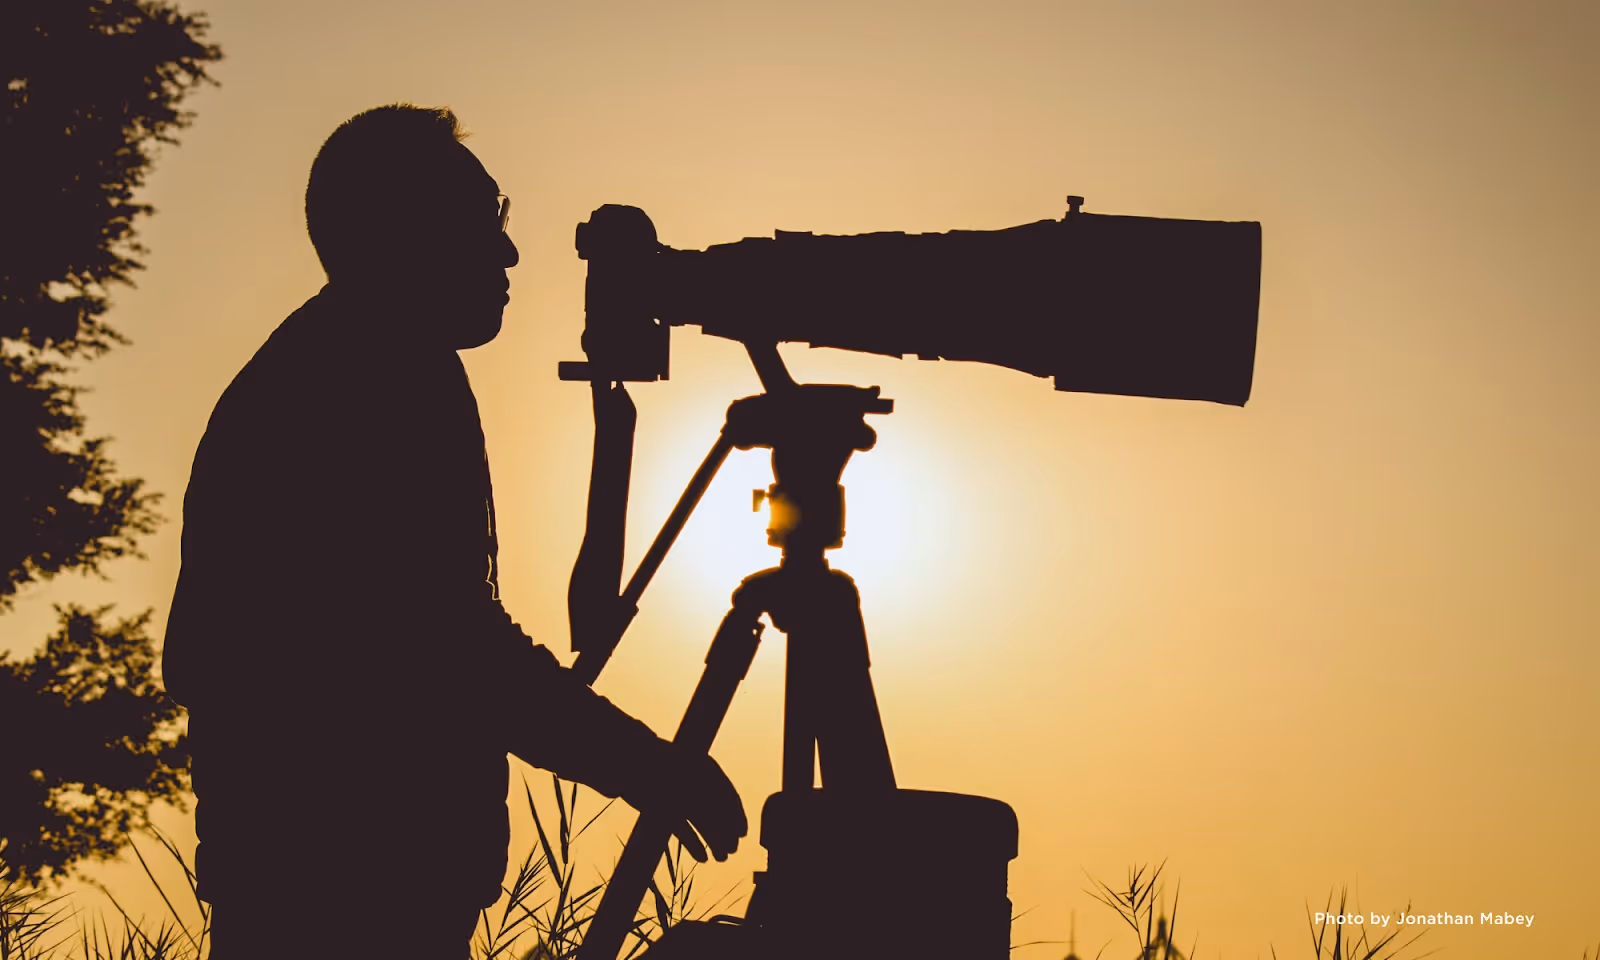
If you're a portrait or wedding photographer, chances are most of your shoots operate pretty similarly in the day-to-day. So why not point that lens at something else: A sunset, people on the street, flowers in your garden, skateboarders at the park, the Milky Way? You may discover new ways to use your existing gear that you never would have thought of before. And who knows! You might even end up finding a new niche.

Nothing lifts the mood like a smile, and there's tons of that on a photo walk. Photography-focused social sites like Flickr can be a great way to find other like-minded photographers to trade ideas, feedback, and inspiration with. It's always inspiring to see what other people are using and doing, and you may end up making a few new friends, too.

Sometimes the best way to stretch your creative practice is to give yourself boundaries. Try taking pictures of just red things, a series only looking upwards, or any other theme you can think of. You'll find yourself liberated by the rules, grounded by great focus, and perhaps even seeing something new in the mundane.

Rending new equipment is easy and lets you take your dream lens out for a spin. From macros to mega-zooms, you can get anything you want shipped to your door and enjoy it for as little (or as long) as you like. These services are especially great for trying out highly specialized lenses like fisheyes, which pack a lot of punch mixed in with your regular portfolio offerings.
Similar to our theme suggestion above, a daily photo project can free you up by giving you some strict guardrails. Taking a photo every day lets you churn out work with less pressure on the precious: it may not be high art and you may miss a day here or there, but we guarantee it’ll get you thinking about shooting each day without the stress of your business or a client.

At the other end of the spectrum, you may just need a break. Put the camera down but don't get stagnant -- go hiking, pick up a paint brush or a pencil, read a great book, or do yoga. Try new things that don't flex your photography muscles, and you may find your creativity comes back with a vengeance.
You’re never too far along in your creative journey to learn something new! The internet is home to thousands of opportunities to learn from other photographers in a more formal, structured environment that lets you focus on a single skill, subject, or topic. From one-day classes to week-long trips, the options are nearly endless. (And as a bonus, SmugMug subscribers get access to some of the world’s best photo education at a sweet discount.)
Taking an afternoon trip to the museum could be the best thing you ever did for your craft. Switch gears, stop stressing about creating your own art, and take a look at what others have done before you. The timeless work of old masters or the trailblazing pieces of new ones can get your brain thinking in great new ways.
Alternatively, our sister site Flickr is the world’s best place to find photography online. From the front page of Explore featuring the best photography happening right now, to the largest archive of historic creative commons photography on earth, there’s something for everyone looking to get inspired.

Nothing gets the creative spirit going like travel. And you don't have to go far! Chances are there’s a whole different side of your hometown awaiting exploration, or cities nearby you’ve never visited. Of course, there’s a whole world out there to explore! So if you’re feeling stuck, throw a dart at a map and find someplace new to get you seeing things in a different light.
Sometimes a little friendly competition is just what you need to hone in and focus on your craft. Get the blood pumping with a photo contest where there's a set theme and (if you like) a tasty prize. Just be sure to check the rules and be sure the way the organizers handle copyright and ownership of submitted images is OK with you.
With these tips in mind, creative blocks don’t stand a chance! Now get out there and keep making magic.

Sports photography isn’t easy. Often done on a speculative basis, success only comes with a great marketing plan, a solid business plan, and a lot of hard work before, during, and after the game. We gathered a few tips to help make the process from shot to sale easier.
Face. Contact. Action. Ball. These are the elements of a great sports photograph. Your ability to get the shot—in sports photography more than any other field—requires more than “f/8 and be there.” Equipment matters since you very likely won’t be able to control the light. Here are a few recommendations:

1. Know your sport.
The ability to anticipate where the action will be, to predict the drama by understanding the rules and rulings, to be prepared for the ecstasy and agony of the competitors are what will set you apart as a sports photographer.

2. Fill your frame with action.
Minimize distracting backgrounds. Choose the right depth of field. Make sure the play or the player is your subject. Shoot tight, crop tighter.

3. Pick the right shutter speed.
In general, you’ll want to freeze the action, so your shutter will need to be fast. If motion blur is desirable to help convey the story or set the mood, a slower shutter speed may work, but you’ll still need to ensure your shutter speed is fast enough to prevent camera shake.
Pro tip: Your shutter speed needs to be greater than the focal length of the lens. Try shooting in burst mode to ensure you don’t miss any of the action. Using strobes? Balance the flash power against flash duration to freeze the action.

4. Get accreditation and/or permission to shoot the sport.
Meet the sports director for the school or club, the president of the booster club, or the director of the league and get their blessing to photograph their players. You should know their needs (yearbook photos, website photos, championship photos, team photos, etc.) and be prepared to include these shots in exchange for the right to photograph the game/league/tournament.
You probably aren’t expecting to head out, take a bunch of game-day photos, and put them up for sale. While you're perfecting your shooting technique, you should also be putting together a strong business and marketing plan, including building your brand name and recognition, your customer base, and your portfolio.

Marketing.
At the stadium.
After the game.
We hope these steps outline an easy strategy to get you started on your way to success in sports photography. Have any tips of your own to share?

If you find yourself glued to your camera seven days a week, it might be time to shake up your photography-pricing game.
Whether you're snapping shots at events, welcoming clients into your studio, or selling your art, the eternal question remains: How much should you charge, and when should you change your rates? And when you do decide to tweak your pricing, how do you figure out the magic number?
Here are five telltale signs it's time to adjust your photography prices (up or down!), along with some advice on how much to adjust them and how to break the news to your clients.
If your calendar's bursting at the seams, it's a surefire sign you're the go-to photographer in town—or beyond. And if you're having to turn clients away, that's your cue to start thinking about raising your rates.
It can be difficult to increase prices immediately, so send an email to past clients and current leads to give them a heads-up that your rates are about to change. You can also post to your social-media accounts to let people book holidays or occasions in advance.
When it comes to how much to adjust your prices, let demand be your guide. If you have a large waitlist, consider a higher amount, such as 50%. If your waitlist is shorter or you have a regular influx of leads, try a lower amount: 20% for a trickle of new leads, or 35% if you're swimming in inquiries. You can always increase later if your calendar stays booked.
Pro tip: Don’t panic if a few clients complain. Even if a handful jump ship, remember that a 20% price increase means more cash in your pocket and more time to savor that work–life balance.
If you’ve noticed print sales are slowing and seasonal spikes are down, it may be a good time to think about reducing prices. But that isn’t your only option.
Try creating a photo package where people save 20% if they buy multiple prints or sizes. If you have an email list, try sending a custom deal to previous customers and share new photos you think will sell. These short-term fixes can help tide you over until demand picks back up.
If you discover your market is saturated, a price reduction may be the solution while you expand your reach to new customers or open shop in another market or niche. Don’t panic! Every photographer hits a dry spell now and then.

Costs to run a business can always increase—sometimes unexpectedly. A landlord could increase your rent. Gear breaks. Clients demand new trends that require new equipment.
If you’re scared to do an increase across the board, start small. Try selecting only a couple of offerings or tossing in a few add-ons to sweeten the deal, like bonus prints or limited-edition backdrops. Or change up your portrait sessions with some fun props. Not only will it add value to each session, it can also make you a trendsetter in your market.
Pro tip: When adding bonus prints, focus on lower-cost items that clients perceive as high value, such as upgrading the print size or material type. Metal, wood, and acrylic prints all offer an extra special touch to meaningful photos.

Getting featured in glossy mags? Picking up steam on social media? That extra boost to your brand can mean big money.
Before you increase your prices, update your portfolio to feature the images that took off and brought you recognition. You’ll also want to reference them on your homepage and potentially add an “as seen in” section with logos. Remind folks that you're the mastermind behind the trend—and why they should be booking you.
Pro tip: If your photos are being featured across the web, ask site editors if they can link your art or name to your portfolio. Not only will this help potential clients find you more easily, it can also help boost your search-engine optimization.

The biggest sign it’s time to increase the price of your photography services is when you’re overworked, facing burnout, and notice everyone else is priced above you.
To figure out your fair market value, start by scoping out the competition. Check out what other photographers in your league are charging, factoring in everything from experience to turnaround times:
Now pick a price that's in the middle of the pack—or maybe a bit higher. You’ll be making more per session, so even if a few clients leave you’ll still be making the same or more as you were—and you’ll have reclaimed a part of your life.
Knowing when to change your photography pricing is half the battle. Knowing by how much and if it should be permanent is the next. Once you recognize the signs, the rest becomes easy.

Looking to boost your photography business's average order value and make booking appointments a breeze? Crafting the perfect photography package is the key. We've got you covered with this five-step guide that breaks it all down. Plus, we'll sprinkle in some expert tips on how to present your packages to potential and returning clients. Let's dive in!
First things first, look at your sales data to see which products are flying off the shelves. Whether it's canvas prints for pawtrait sessions or wallet-size paper prints for senior portraits, tailor your packages to what your clients love.
Pro tip: Add high-margin items like metal prints or photo books as upsells to specific packages to boost your income and keep your clients happy.
When it comes to package options, three's the magic number. It's enough to offer variety without overwhelming your clients. But hey, if you've got a killer custom bundle in mind, toss in a fourth option for those looking for something extra special. And remember, each package can be tailored to different types of photography, so you're always ready to capture those unforgettable moments.
Here’s an example of offering three different packaging tiers for two different types of photography:

Pro tip: Create unique landing pages for each type of photography you offer to showcase relevant samples of your work to clients and improve your visibility in Google searches.
Time to get creative with your package names! Keep it simple with standard labels or jazz things up with a bit of branding. From "Classic Collection" to "Pawsitively Platinum," let your imagination run wild (but not too wild—you want your clients to know what they're getting!).
Pro tip: Use themed package names to add personality and create a memorable experience for your clients, like "Hot Cocoa Holiday Specials" for seasonal sessions.
An example of standard package names:

Pricing your packages doesn't have to be difficult. Start with a basic formula—think business costs + materials + labor + profit + taxes—and set your pricing based on your margins.
Focus on items with higher margins that are in high demand and aim for a base margin of 50% or higher. For example, if paper printing has a 20% margin and canvas has a 70% margin, include canvas prints in your popular packages to offset lower-margin items. Adjust your package contents to maintain or exceed the 50% margin goal. For instance:
Original package:
Adjusted package:
By making strategic adjustments, you can meet or exceed your margin goal, boosting your profitability.
Pro tip: Highlight high-margin items like canvas prints or metal masterpieces in your packages to boost your overall margin and offer added value to your clients.

Now for the fun part—showing off your photography packages. Whether it's through eye-catching colors, playful fonts, or strategic sizing, make sure your options are front and center.
Pro tip: Use design elements like banners or starbursts to draw attention to your best-seller or current promotion and guide clients toward their ideal package.
Here are a few examples of ways to display your photography packages:


And there you have it—the ultimate guide to crafting, pricing, designing, and showcasing your photography packages.
Ready to take your business to the next level? Click here to give SmugMug a try for free and revolutionize the way you book clients, sell prints, and share photos securely.
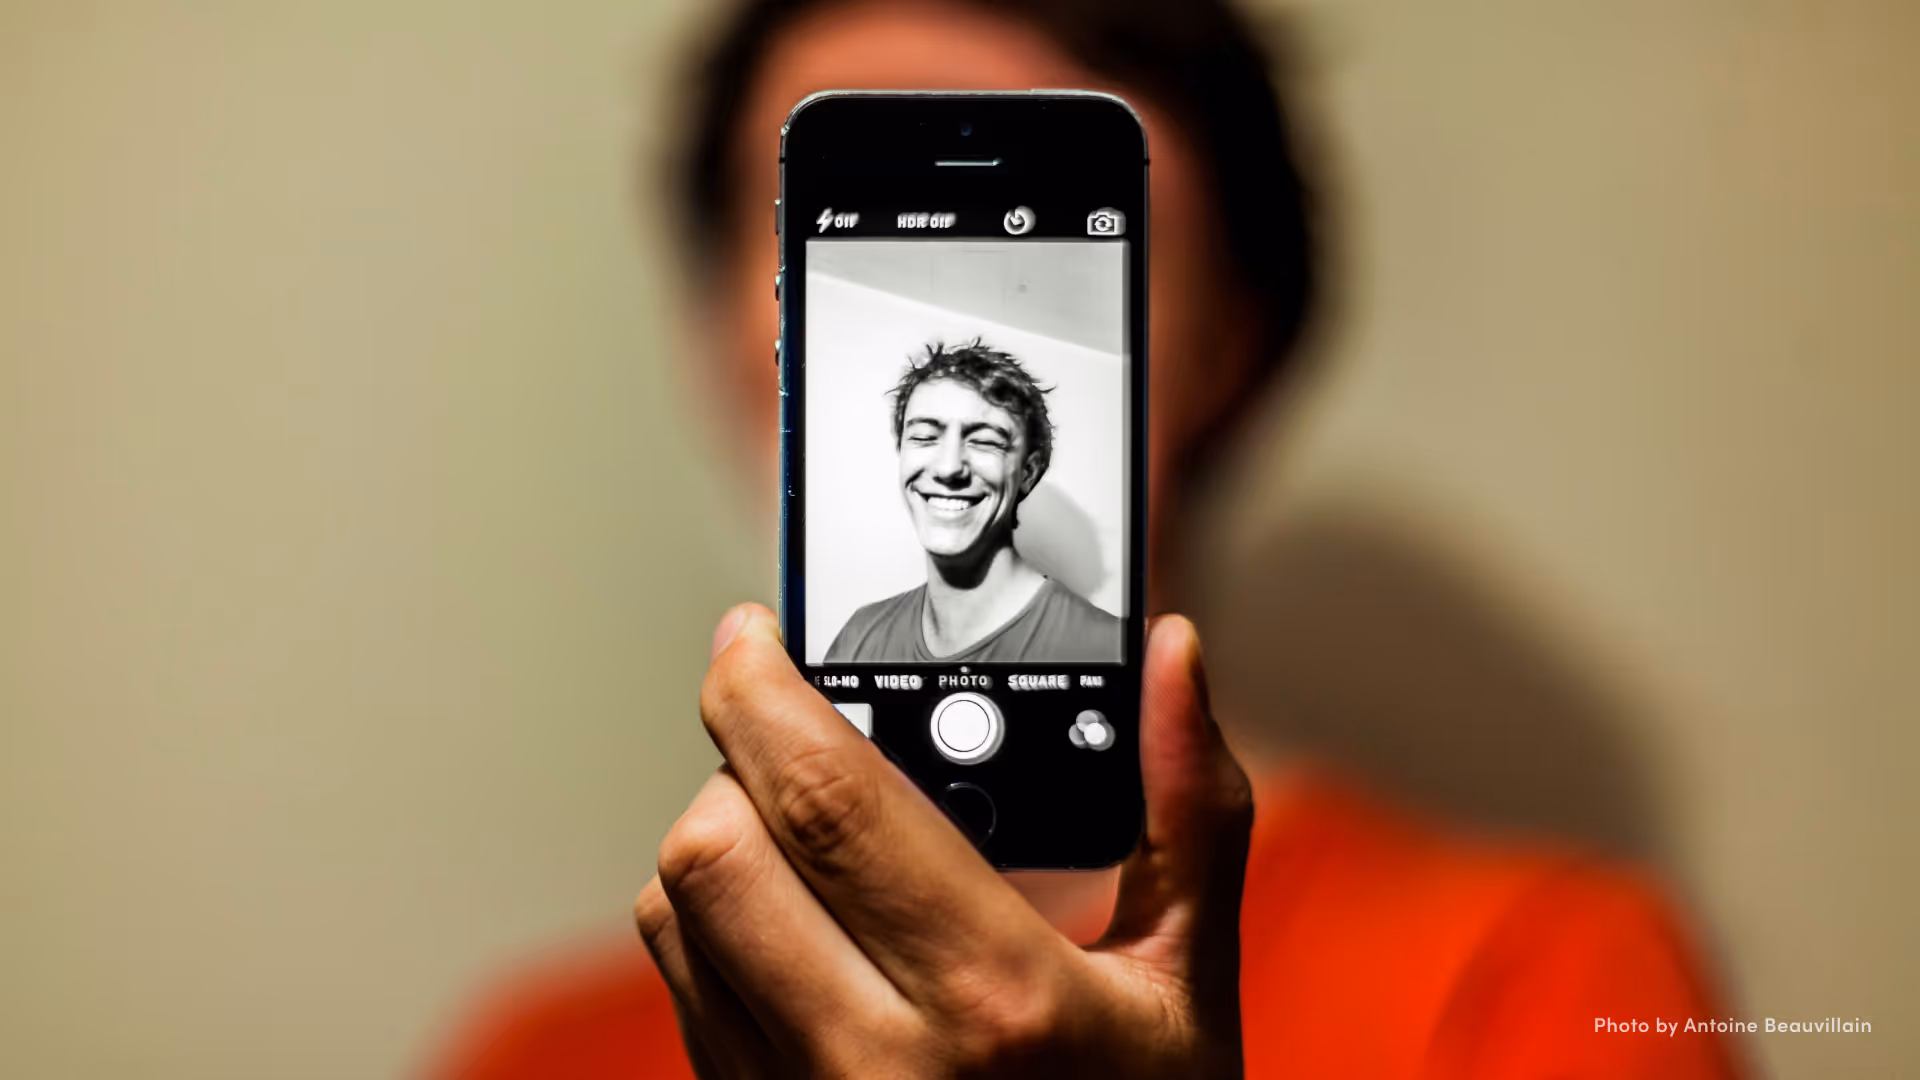
Ever found yourself scrolling through social media, seeing one too many selfies? We've all been there. But have you ever thought of turning everyday selfies into creative self-portraits? A rainy day or a lull between shoots can become an opportunity to refine your photography skills, and perhaps discover a new form of creative expression. Who better to be your subject than the most cooperative model you know—yourself? To help kick-start your journey, we’ve put together ten tips.

When starting your self-portrait journey, keep it simple. Opt for a blank wall in your home or a simple textured background outdoors, like a brick wall. This allows you to be the focal point of your composition, emphasizing your personality and style.

Sticking to simplicity, start with natural light so you can focus on composition, posing, focus, and everything else. Try standing near a window during golden hour or finding some open shade outdoors for easy and flattering portrait lighting. These both create soft shadows and bright catchlights in the eyes while avoiding dark under-eye circles: instant beauty filters.
As you advance, try experimenting with advanced lighting setups and techniques such as two-point lighting or a background separation light. Try playing with homemade grids, gels and white balance settings, short and broad lighting, and anything else you’re curious about. See if you can reverse engineer the lights in portraits you admire!

While autofocus is a handy assistant, you might not want to shoot at a higher aperture like f/8 to ensure it nails focus on your eyes. If you want to create a dreamy effect with a shallow depth of field, how do you keep the focus from landing on your ear by accident?
No remote trigger? No problem! Use your phone or camera's built-in self-timer as a convenient alternative. Start with 30 seconds so you don’t feel rushed running from camera into frame, and you’ll have plenty of time to set your pose. If you get tired of the extra cardio, consider the array of remote triggers available in the market—even for smartphones!
If you don’t have a tripod, use a table, a counter, a stack of books—anything that’s stable and level.
Choosing the right lens is crucial for achieving your desired composition. Wide-angle lenses help in confined spaces while shorter focal lengths, like 50mm or 85mm, work wonders for close-up portraits. If you have the space, longer telephoto lenses can help separate you from your background

Visualize the outcome, research and experiment with poses, and let your self-portraits tell your story. Capture natural, relaxed expressions with the help of music, memories, and a few tricks of the trade. Try jutting your chin forward a bit without moving your neck for a more flattering jawline. If you have a habit of clenching your jaw, press your tongue to the roof of your mouth to relax it.
Instead of immediately checking a shot after each click, resist the temptation and go for comprehensive reviews after a series of shots. Adjust your posing based on the collective story told by your images and on what you like or dislike. Checking each shot can get in the way of the kind of spontaneity that makes portraiture great.

Go beyond the basics by introducing costumes, props, smoke bombs, and diverse environments into your self-portraits. Tell compelling stories through your images, injecting a dose of creativity into each frame.
Don't shy away from the editing room. This is a chance to try those filters and actions that look amazing but might not work for your clients. Explore the art of compositing to enhance your portraits further, seamlessly blending elements to craft the story you want to tell. If you shot outside during a sunny day, for example, but wanted a moody portrait, try replacing the sky with a darker one filled with storm clouds. Or if you’re missing that perfect prop to tie everything together, find a stock photo of it online and edit into your image to complete the story.

Hungry for more? Dive into self-portraiture with insights from SmugMug pros and Ambassadors, and exclusive SmugMug perks (make sure you’re logged in to your account for perks). Explore the nature of self-portrait art with Lizzy Gadd, learn compositing from Renee Robyn, and unlock discounts on resources to fuel your creative journey.
_______
Remember, the art of self-portraiture is where you tell your story—unique, personal, and undeniably you. We hope these tips help you capture the essence of your one-of-a-kind self. Happy shooting!

When natural light won’t work or isn’t enough, strobe lighting can be your saving grace. Here’s your official guide to strobe photography.
Strobe lighting can help take your photos to the next level by giving you perfectly lit photos every time. There are so many ways to use them, from portraits to underwater photography. Of course, natural light will always be king, but sometimes natural light needs a little help.
For instance, you may want a more dramatic outdoor shot with a well-lit subject, vibrant colors, and dark background, or you may do a lot of portrait or studio photography.
If so, strobe lighting may be a worthwhile investment as opposed to using only an on-camera flash or flashgun.
Strobe lights, also known as monolights, are extremely bright and emit rapid bursts of light.
Strobes and speedlights are similar in that they both emit short bursts of light, and both need low shutter speeds. A speedlight, also known as a hot-shoe flash or flashgun, can be used as an on-camera flash or off-camera lighting.
Strobes are strictly for off-camera use and are more powerful than speedlights. They also have a faster recycle rate. You may need a few seconds in between shots for a speedlight to recycle, while a strobe will recycle and be ready to go again almost instantly.

Speedlights are more compact and portable, while strobes are larger and mostly used for studio shoots.

LED lights, halogen lights, and xenon flash lamps are all used for strobe lighting. Depending on the kit you buy, they can range from 100 to 1,000 watts. When purchasing a strobe kit, you may want to look for one with adjustable output. This will allow you to turn the light intensity down when doing close-ups and use more power when your subject is farther away.
One of the many benefits of strobe lighting is that it’s powerful enough to overpower the sun, yielding some unique effects. Using a strobe outdoors will highlight your subject against the background and give you a powerful and vibrant shot.
If you’ve never used strobes before, you’ll be happy to know they’re beginner friendly. All that’s needed are a few setting adjustments, and you’re good to go.

Once you’re comfortable working with a strobe, you can unleash your creativity and start taking stroboscopic portraits. This unique photography style uses strobe lighting combined with long exposure to create stop-motion pictures. All you need is a strobe that allows you to adjust the number of flashes and the frequency. Set off the strobe a number of times during a single long exposure while your subject moves. Experiment for some fun and interesting effects!

We hope you’re encouraged to add strobes to your next shoot if you haven’t tried them already. They’re fast, powerful, and are sure to enhance your photos.
----------------------------
Have you worked with strobe lighting before? Let us know your thoughts in the comments below, or start a conversation on X, Instagram, and Facebook.

The first moment we saw Corrie White's incredible macro images, we were floored. Corrie taught herself how to photograph these teeny, fleeting sculptures and found so much success she wrote an ebook teaching others how to do the same. We asked her a few behind-the-scenes questions about her experience in a small, small world.
What inspired you to start capturing liquid drops?
Years ago, I stumbled upon the Liquid Sculptures of Martin Waugh. I was fascinated with them and kept going back to marvel at his beautiful works. In early 2009, I had some free time and decided to give these a try for myself. I found I had a knack for doing these manually, and the rest is history. I’ve always had a love for macro photography and started with a Sony DSC-H1 point-and-shoot camera many years ago. I found this very limiting and got an entry-level DSLR. In 2008, I acquired a Canon EF f/2.8 100mm macro lens, which was essential for my water-drop photography.
How much experience did you have with strobes before you started photographing droplets?
I had never used any external flashes before I did water-drop photography. Indeed, for the first half year I used my camera pop-up flash for my water drops. I knew nothing about flash-exposure compensation and soon learned why I was getting those cool—but annoying—light trails on my drops.

How exciting was it to discover the three-drop splash—a new drop structure? Will it be named in your honor?
I was so ecstatic when I saw the three-drop splash appear on my little screen. I did a little dance! Something entirely new that had never been done before. I was very excited. Will it be named in my honor? I can't say, but I really don't think so. Martin Waugh has the distinction of taking water drops to a new level with his two-drop collisions. I personally think anything after this is secondary. What you see currently in the water-drop world are extensions of his creations. I'm just happy to have discovered some new shapes in a world where it's hard to come up with something totally unique.

What type of publications and sites tend to purchase your work?
The interest in my water-drop art is very diverse, anywhere from photography magazines to children's magazines. There’s a lot of interest from the science world, especially in the field of fluid dynamics. One of the most memorable compliments came from a professor at MIT, who said they brought a tear of joy to his eye and shared the work with his students.
Have you ever been commissioned to shoot a specific drop image?
Not for any monetary value. I’ve been asked to do certain abstract images, but they’re very difficult, especially when I need equipment I don't have available to me. Right now I’m trying to find time to create an Amanita mushroom, which will be a difficult but fun project. I much prefer to work in an uncontrolled atmosphere with colors and shapes that I like.


What kind of droplet images are on the horizon for you to try?
I really don't know what the future holds for me with respect to my water drops. Is there more undiscovered territory with them? I’ll certainly see what's possible and test the limits. I may try multiple valves, but that’s becoming commonplace and I prefer to find the unique. The possibilities are endless, and I would like to find more surprises in the liquids.
Say someone had only $200 to invest into trying this kind of photography. How would you recommend they use it?
I always suggest that before people go out and spend lots of money on electronics, first try out a manual setup to see if you like this type of photography. You only need to spend a small amount of cash on a flow regulator from an aquarium supply store, or an IV-drip contraption, to start out. Use your DSLR with manual controls, a regular lens with zoom, your pop-up flash, and see if this is what you want before you take it to the next level. It's a great hobby, especially in the cold winter months. Be careful, though—you can get hooked!
Buying a macro lens is a good investment if you like macro photography in general. Buying an electronic timing device can be useful for much more than water-drop photography. I’m familiar with Mumford's Time Machine: it will do time-lapse photography, ballistics, and many other types of photography. I would like to do some time-lapse experiments in the near future.


What have you learned from droplet photography?
I’ve learned that within each of us is a creative spirit. I’ve found mine in liquid-art photography. It’s an exhilarating, relaxing, and very rewarding experience. I find great satisfaction that so many people have been inspired by my water-drop work and the techniques I use. They’ve expressed gratitude that I’ve shared my experiences with them and, although some say I should keep some of my methods secret, I find the opposite to be a richer experience. "Imitation is the sincerest form of flattery" rings true for me, and I’m honored to see others experimenting with my methods.

It's that time of year when folks fire up the oven and start whipping, baking, simmering, and roasting. With all those great things coming out of the kitchen, you're going to want to share every delicious morsel with friends, fans, and family who can't personally make it to dinner.
Here's how you can take delicious, reach-through-the-screen-good photos of your cooking using any camera—even your smartphone.

Your culinary creation is the star, so let it shine! Crop out the non-essentials cluttering your scene—say goodbye to salt and pepper shakers, spare chairs, and the eager anticipation of hungry guests waiting for you to wrap up the photoshoot.
If you can’t physically remove a distracting object, play the angles game. Capture your dish from every perspective imaginable—get low, go head-on, and even shoot from directly above. By exploring various angles, you'll discover the perfect viewpoint that makes your dish the undisputed hero of the frame, ready to tantalize taste buds through the screen.

Position your food near a window and let the natural illumination work its magic. Natural light is your secret ingredient to showcasing your latest culinary triumph.
If you're shooting during the morning, embrace the cooler tones, but any soft, bright light from the side is a win. Consider overexposing a tad to let those delicious details bask in the limelight.
For those early-winter evenings when darkness descends with dinner, bounce your flash off the ceiling or a nearby wall to create an even spread of light. When executed with finesse, this technique mimics the serene glow of a perfect spring morning, bringing warmth to even the darkest winter nights.

Capture the essence of your culinary creation before you dive in, leaving fingers and utensils out of the frame. You're orchestrating a moment of delicious anticipation, so why spoil the fantasy with teeth marks and someone else's hands?
Exceptions exist, of course. When documenting the step-by-step cooking process or showcasing the joyous atmosphere of your guests enjoying the feast, feel free to bend the rules. Just remember, for that initial, mouthwatering reveal, keep it clean, crisp, and hands-free.

Bring your dish to the forefront by getting up close and personal. Fill the frame and let the textures take center stage. There's nothing sadder than a small, blurry burger lost amid the expanse of a huge table. Your food deserves to be larger than life, just like the moment before that first bite. So get as close as your lens allows and capture every savory detail.
To accentuate this, play with a shallow depth of field. Nail the focus for crystal-clear details or elevate the ambiance by enhancing the bokeh during post-processing, giving your food the attention it truly deserves.

Elevate your food photography by embracing a spectrum of colors. Say yes to vibrant berries, lively herbs, and a parade of ingredients that add a burst of brightness to every corner of your shot. With a harvest of bold, beautiful choices like pomegranates, persimmons, currants, and squash, you have a palette of options to make your plates shine.
Don't forget to give your favorite dinnerware its moment in the spotlight, too. Whether serving as a neutral backdrop or injecting extra visual interest into the scene, the good china is ready to complement your scrumptious meals.

Why hoard the culinary magic? After capturing your favorite creations in photos, take it a step further and turn them into recipe cards printed on our user-friendly 5x7 card templates. You can find blank templates in the Other Occasions category in Greeting Cards.
Spread the joy by slipping these gems into your annual holiday mailings or attaching them to the ribbon of every present you give. Recipes are the gift that keeps on giving—a personalized touch that warms hearts and tantalizes taste buds.
_______
Happy shooting! Here's to capturing delicious moments and spreading the joy of fabulous food photography this holiday season.

Attention, Lightroom lovers! Today we have a post by our friend, Matt Kloskowski, founder and CEO at Matt Kloskowski Photography and Education, former education director for Kelby Media Group, and a Tampa-based photographer. Kloskowski is the author of several best-selling Photoshop books and teaches Photoshop, Lightroom, and photography seminars around the world. He hand-picked a few favorite ways for Lightroom users like you to get your photos finished faster. He's currently promoting a new "Goodbye, Lightroom" course to help users transition from Lightroom Classic (the desktop-only version) to Lightroom (the cloud version).

We've all heard the phrase "time is money." Well, if you're shooting weddings or events, you need to get through your photos and get them organized quickly and efficiently. Then you can get on to the good stuff: editing and getting out there to shoot more photos. So to help out, I've compiled my favorite tips to kickstart your workflow and keep you moving through Lightroom as quickly as possible.
A big part of speeding up your workflow is identifying your favorite photos. If you look under the Photo menu, you'll see Lightroom has two ways of picking your favorites: Set Flag and Set Rating.
Ratings are difficult to work with. Most people are familiar with the 1- to 5-star rating system, but the main drawback is it has too many choices. Five stars is a keeper, right? Four stars probably means the photo is pretty good. Three means it's decent. Two would be bad. And one star would be a reject that you throw away. But what happens if you go through your photos and come across something that isn't a throwaway or isn't an absolute keeper? You sit there and debate whether it's a two-, three-, or four-star photo. Either way, it's not your favorite, so you'll probably never do anything with it. Yet you're giving it too much time in the rating process. And, inevitably, when something takes too long, we stop doing it.
Instead of using ratings, try using the flagging system. This way, you get two choices:

Go through your photos quickly and hit "Z" to flag or "X" to reject. If you don't flag it or reject it, then it stays unflagged, which is that grey area you're just not sure about. But you don't have to press a key to be indecisive—Lightroom just assumes you're indecisive about the photo by leaving it unflagged. So your job becomes really easy! Flag it if you like it and think there's a remote chance you'll do something with it again one day. Reject it if you don't. Then hit the right-arrow key and move on.
Another way to speed things up is to keep your library as clean as possible and get rid of the stuff you’ll never use. If you followed the previous step and are using the flag system, you should have some rejects that were marked with an X. A simple way to delete them is to select the filter icon near the search bar at the top of the window and then select the rejected-photos flag. Select all the photos in the filmstrip at the bottom and right-click > delete. Lightroom will delete all the rejects at once so you don't have to go back and get rid of them later.


Using Albums in Lightroom is more important than ever and probably one of the fastest and best ways for you to speed up your workflow. Photos that go into an album are photos that should be one click away and the photos you'll want to see most often.
Let's say you have 2,000 images from a wedding. You want to quickly show them to the bride/groom or family. Do you go through and show them all 2,000 photos? No way! Instead, you create an album. It's a way for you to get to your favorite photos in just one click.
Typically, I'll look at my photos and go through them one by one. I'll hit the letter Z to flag photos as a favorite when I come across them. Then I can quickly sort to see only my picks by clicking the flagged icon in the Filter strip.

Once I've figured out what my favorites are, I select them all (Edit > Select All), go to the Album panel, and create a new album with a descriptive name (usually the last name of the bride/groom).

Albums have an extra level of organization called Folders that are key for events like weddings. Think of a folder set as a group of nested albums. If you put your picks from a wedding/event into an album, you'd have all the best photos from all parts of the wedding in one place (the album you created). The problem is that this album could be huge. This is where folders come in.
You'd create a folder (for example, a top-level folder with the bride/groom name) and then create albums within the folder for each part of the wedding (formals, church, reception, etc.). Here's what a folder could look like in Lightroom:

Once your photos are all cleaned up and ready to go, you're just a few clicks away from uploading them safely into your SmugMug website. The publish plug-in is free, gets your photos seamlessly into SmugMug, and also lets you sync, make galleries, and keep your online presence as clean and organized as your Lightroom library. You can also see and adjust your customer's event favorites, republish, and even proof your orders all right within the SmugMug Publish module. Get it now.
_______
What Lightroom tricks have cut time off your photo-editing workflow? We'd love to know!


